
Problem Solving with Fredrix Pro-Series Dixie Canvas Kit
I love working on commissions. Creativity, problem-solving, getting to speak with clients; the process combines some of my favorite parts of being a working artist. As much as I try to make sure everything is ready, planned and budgeted correctly, as with any long-term project— issues can arise that could possibly derail the progress.
In this case I’m excited to share an issue that came up in the initial planning stage -- which I can happily report is solved.
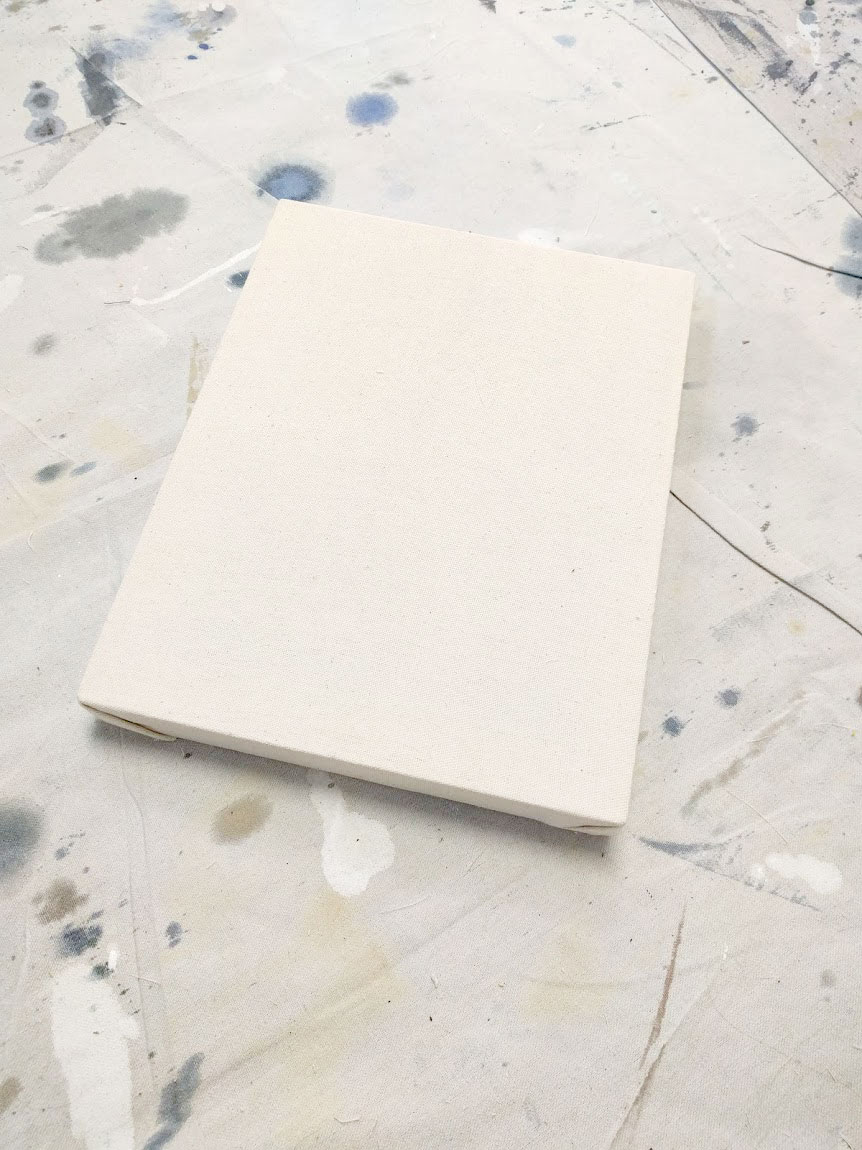
Staying within a budget for a project is incredibly important to me. I value my clients time and information and do everything I can to make sure the finished version aligns with the initial projected cost. On this project, the canvas was large enough (40 x 60) that it wouldn’t leave a lot wiggle room for the shipping. Well, not any in truth, and thus made the project less than feasible. We didn’t want to break the sketch into two pieces for cheaper shipping, and moving to paper to roll it up wouldn’t work with our sketch either. Feeling really dismayed that I wouldn’t be able to make this project fit in the budget, I tried one last option.
The Fredrix Dixie-Pro rollup canvas kit.

The kit is a rolled, pre-gessoed length (multiple sizes to pick from) of Fredrix’s Dixie Pro canvas. It’s stapled on one side with a sturdy cardboard tube in the middle to support the canvas and is packaged with all the appropriate sized stretcher bars and their patent-pending stretching tool. By using the kit I can stretch it in my studio, paint the work, undo the canvas and repackage in it's original long, thin box to send out. With this arrangement shipping is far, far less of a concern and makes the project 100% feasible.
What I needed:
-Electric drill
-Staples/Staple gun
((Everything else is included in the kit.))

To put it together, I simply unrolled the canvas on my vacuumed studio floor, and aligned the stretcher bars. From there I screwed in the cross pieces at 90 degree angles and added the crossbeams. Once the frame was together I used the provided tool system to stretch the canvas and staple down.
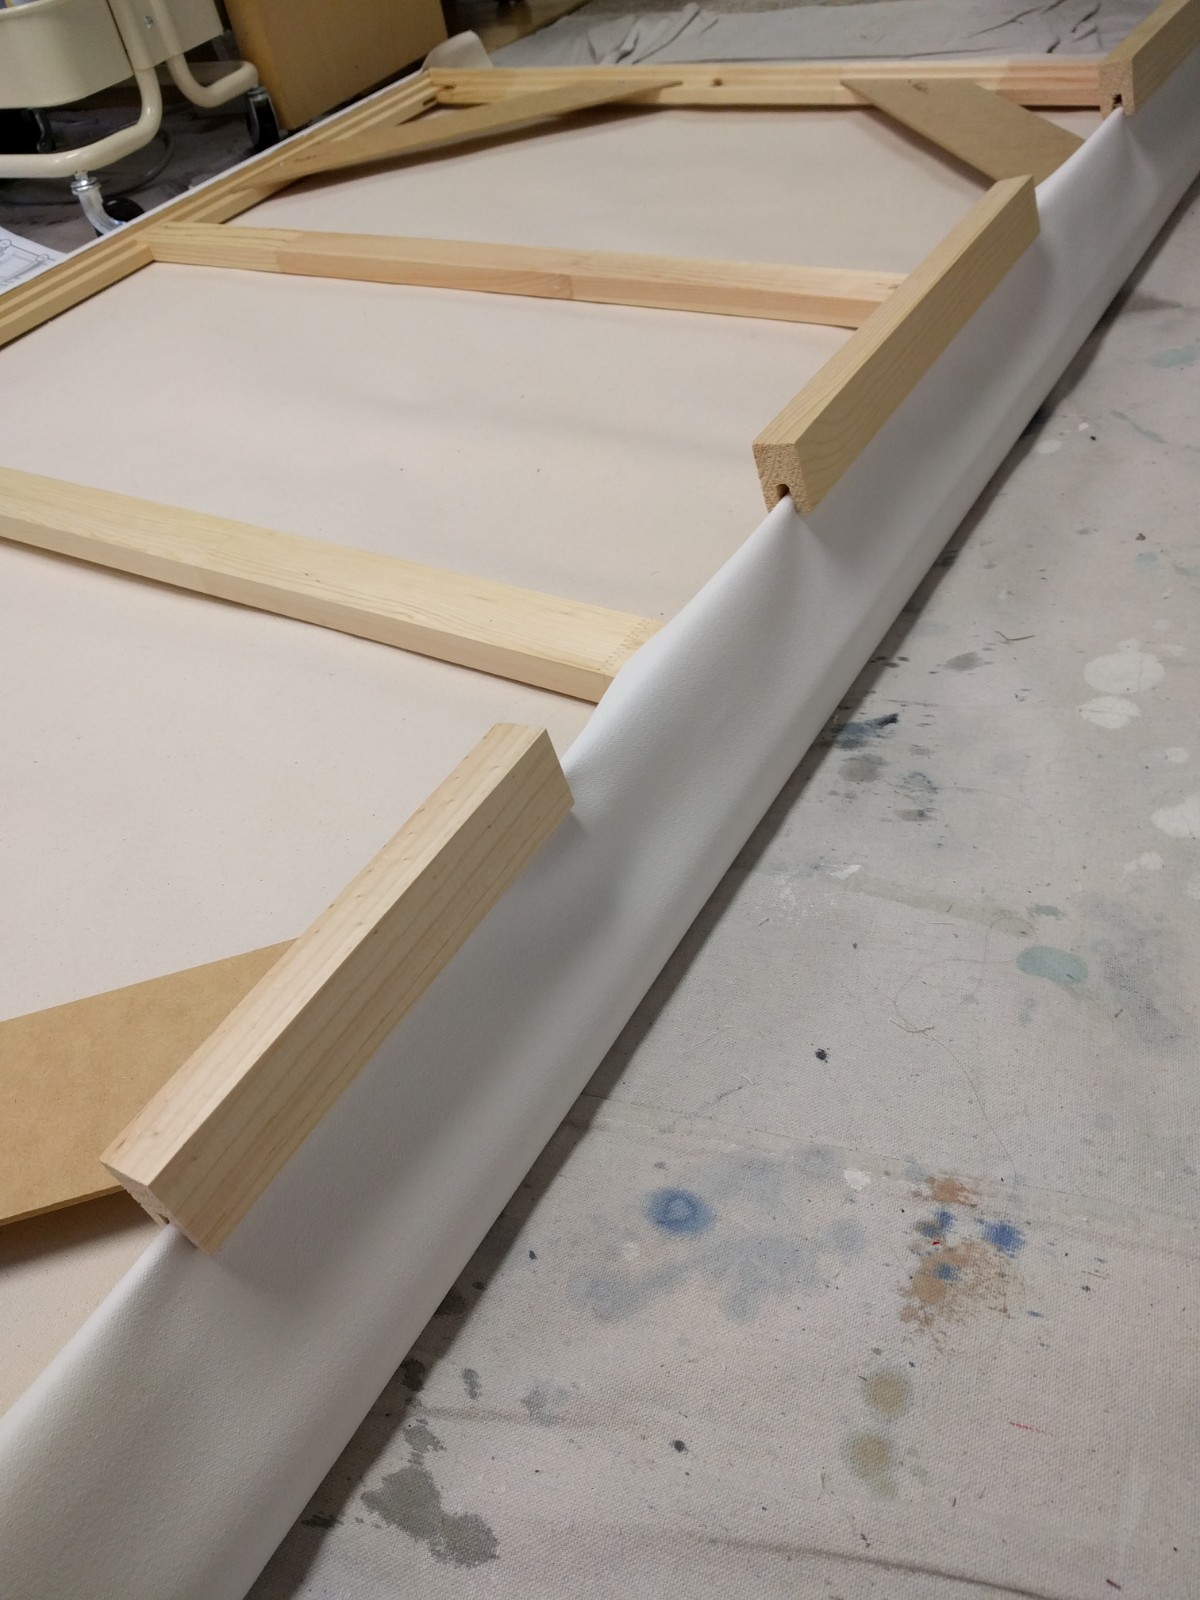

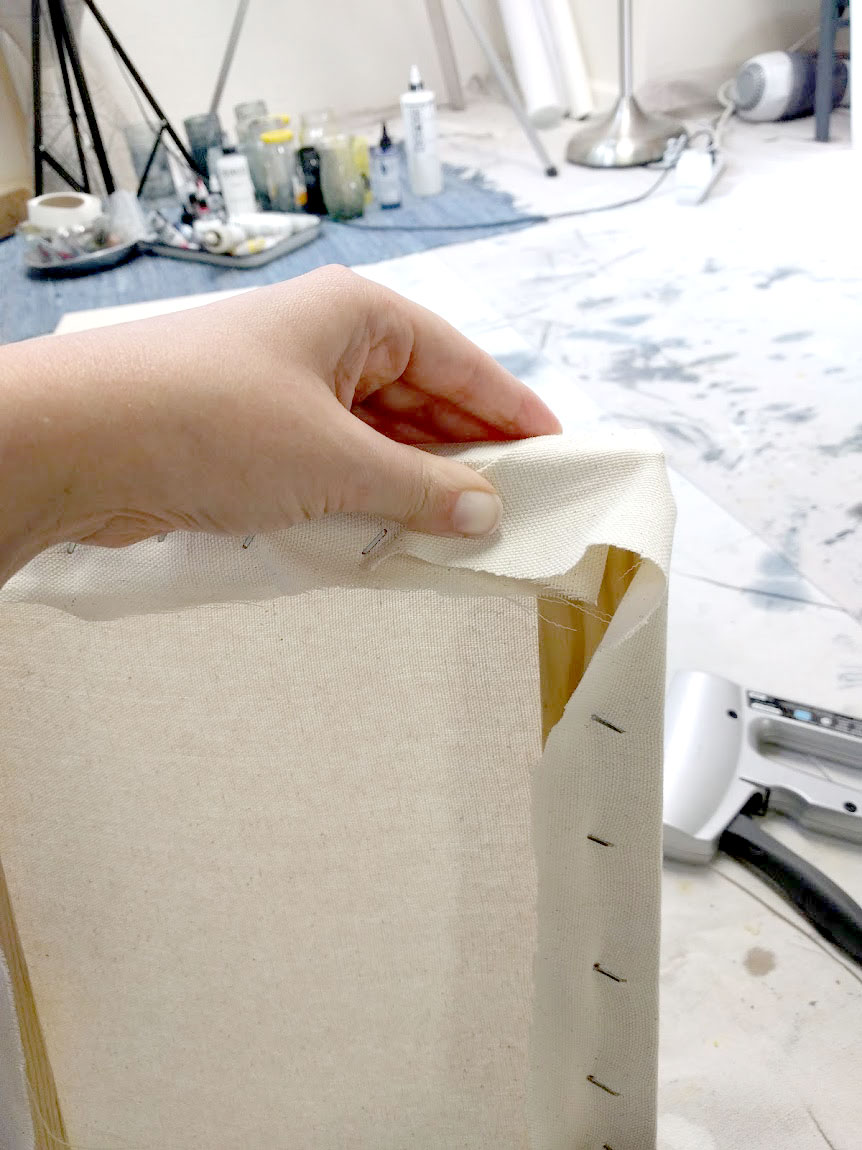
I usually stretch my canvases by hand, or by using a set of metal stretcher clamps --- but I was seriously so impressed with the Fredrix kit stretching system. It was incredibly easy to get a perfect tautness in the canvas, and even easier to staple down. If I was stretching the kit without the disassembly I’d cut the extra canvas off and fold the corners - but since my client will be re-stretching on her end I left the extra.

The canvas was easy to build, and will be just as easy to take apart to save on transit fees. I’m ridiculously thrilled that it solved the shipping problem and made this project possible --- and can’t wait to start the painting phase!
Stockist Spotlight: Thistle and Bess
I’m pretty particular about the places that stock my work.
It’s got to be a shop that you feel good walking into, with people who care about their community and give back to the area that supports them. A shop that sparks a bit of joy.
(Patterned wallpaper is always plus too)
Which is why I’m so thrilled to have work available for purchase in Ann Arbor’s Thistle and Bess.

The shop is near literally the cutest thing on the planet.
Each carefully curated and displayed item has a story to share, a tale to tell. And it's all just so. cool. I could spend hours looking everything, discovering makers, artists and all sorts of products that just make my heart sing.


The shop is located in the Kerrytown area of Ann Arbor, which is filled with fun little spaces to explore and lots of restaurants/cafes. It's one of my favorite locals for a brainstorm-lunch, or a coffee-fueled sketching session outdoors.
AND! On October 27th right there in the heart of Kerrytown I'll be at Thistle and Bess for a Meet the Artist event. I'll have originals, limited edition prints and a few new pieces to share - so make sure to stop by if you're in the area.
Vestige of Summer; Painting Outside
The sun was just starting to dip beyond the treeline casting deep golden beams across our back lawn. A slightly confused cricket was already chirping away. The vestiges of summer.
I had to paint outside.
I knew I didn't have an abundance of daylight left, so I gathered what I could quickly. A dropcloth pinned down by a plant, a few basic paints and what was left from last night's mixings, and the first brushes I could get my hands on.

I love working in the backyard of our rental home (moving into the new place in October!). The squirrels are super vocal, birds gather in all the trees overhead and it's impossible for me not to feel at least the slightest bit at peace.

_____________________________________
Also, 80% of the 'lawn' in our backyard is mostly very tiny strawberries. If that doesn't put you in a mood to create, well, nothing will.
_____________________________________


Even managed to catch a bit of lens flare.
There's something so wonderful about being outside and working; soaking up the birdsong and scent of green growing things and translating that to paper is magical.
Vestige of Summer will be up in the shop for the next update, planned for Friday, Aug 25th.
We'll be on the road for the weekend - heading out to California to visit friends and take some time off. Well, sort of 'off'... I'll still be painting, but not answering as many emails :)
How I Stretch Canvas - Tutorial
I've gotten a number of questions asking how I build/prepare my painting surfaces, and am still so excited about the previous InstaStory tutorial I made - so I thought I might put together a little blog-compendium for the story. This will be a bit more information with links and such that couldn't be addressed in the story form. ((Though, the story has a few mess ups - follow me to see the mistakes!))
This tutorial begins with a pre-made set of stretcher bars from a previous painting, though I will cover various ways to create your own stretcher bars in a future post. For now, grabbing a set from an art store should suffice.
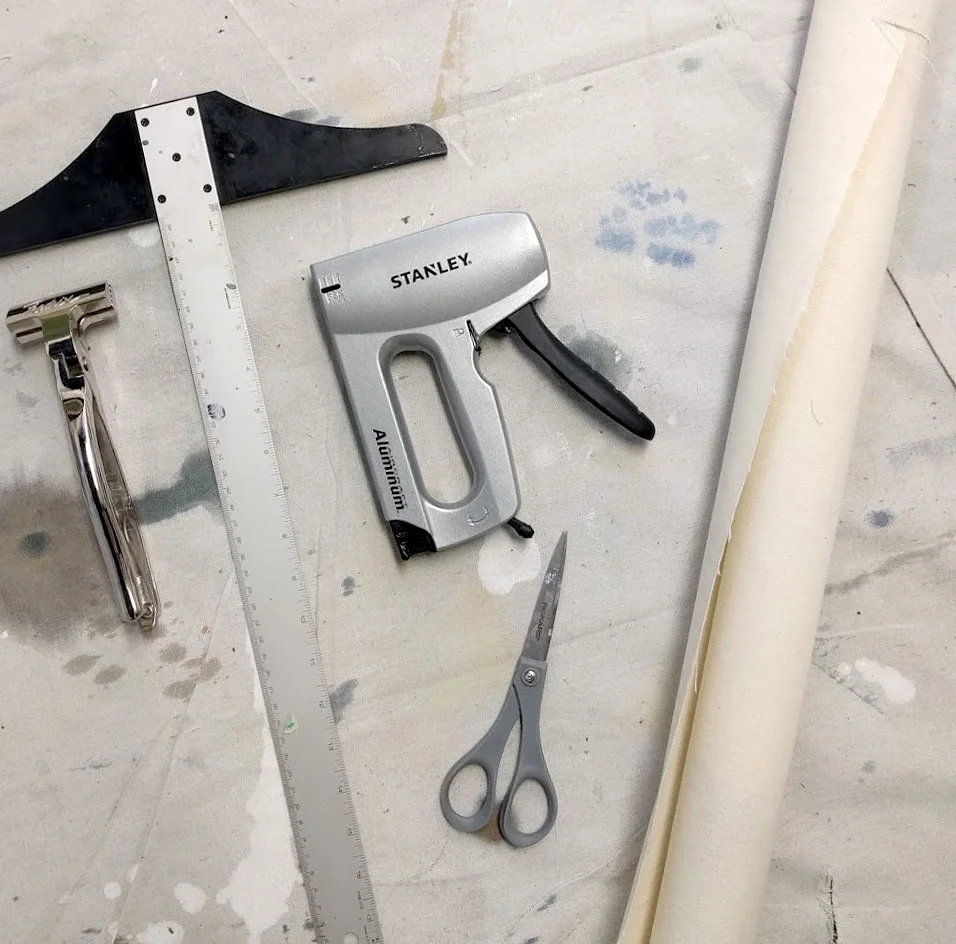
Step 1.) Materials:
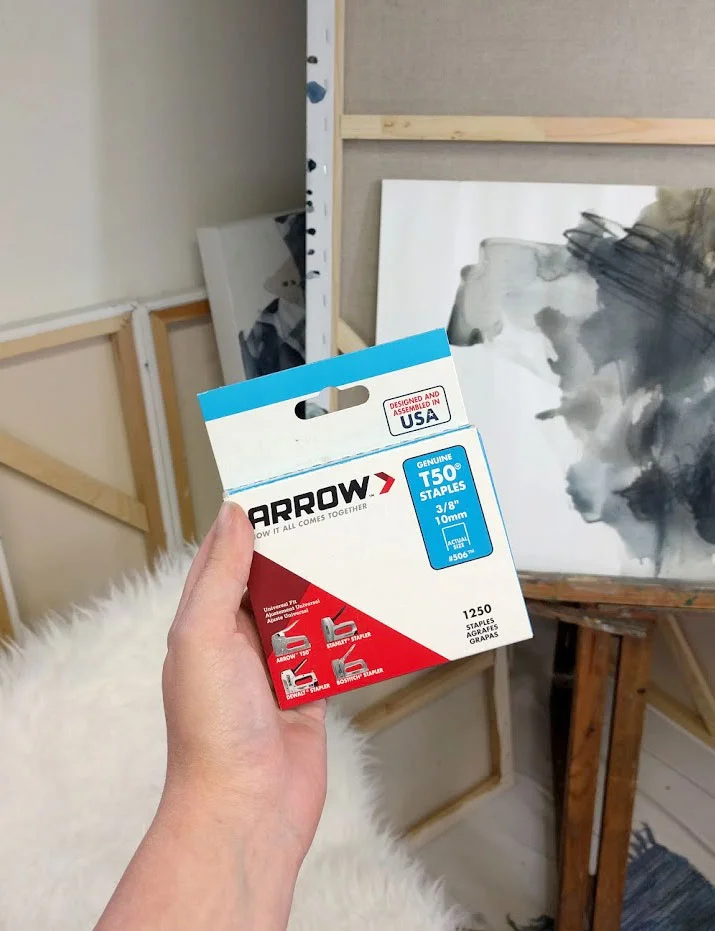
Here I have (from left to right;) My trusty Fredrix canvas pliers, T-square, Stanley Staple gun, T50 Staples, Scissors and Canvas Roll.
List:

Step 2.) Roll Out
I'm a huge fan of "measure twice, cut once", so when I roll the canvas out I don't just eyeball the extra length. I make sure that each side will reach (with some extra room too!) past the stretcher bars.

--- > Note here, if your stretcher bars have a lip like this, that needs to be on the bottom, on what will be the surface for the painting.
Step 3.) Lay Out
Once the canvas has been measured, cut the roll to leave enough space around the stretcher bars for stapling. Some of the canvas may be warped from storage and you can absolutely iron it -- but it should pull taut during stretching regardless. Make sure that the stretcher bars are lined up with the grain/weave of the canvas.

Don't pull too hard, just finger taut is fine. Too much pulling and the canvas might pull apart or rip through the staples. Don't hulk out.

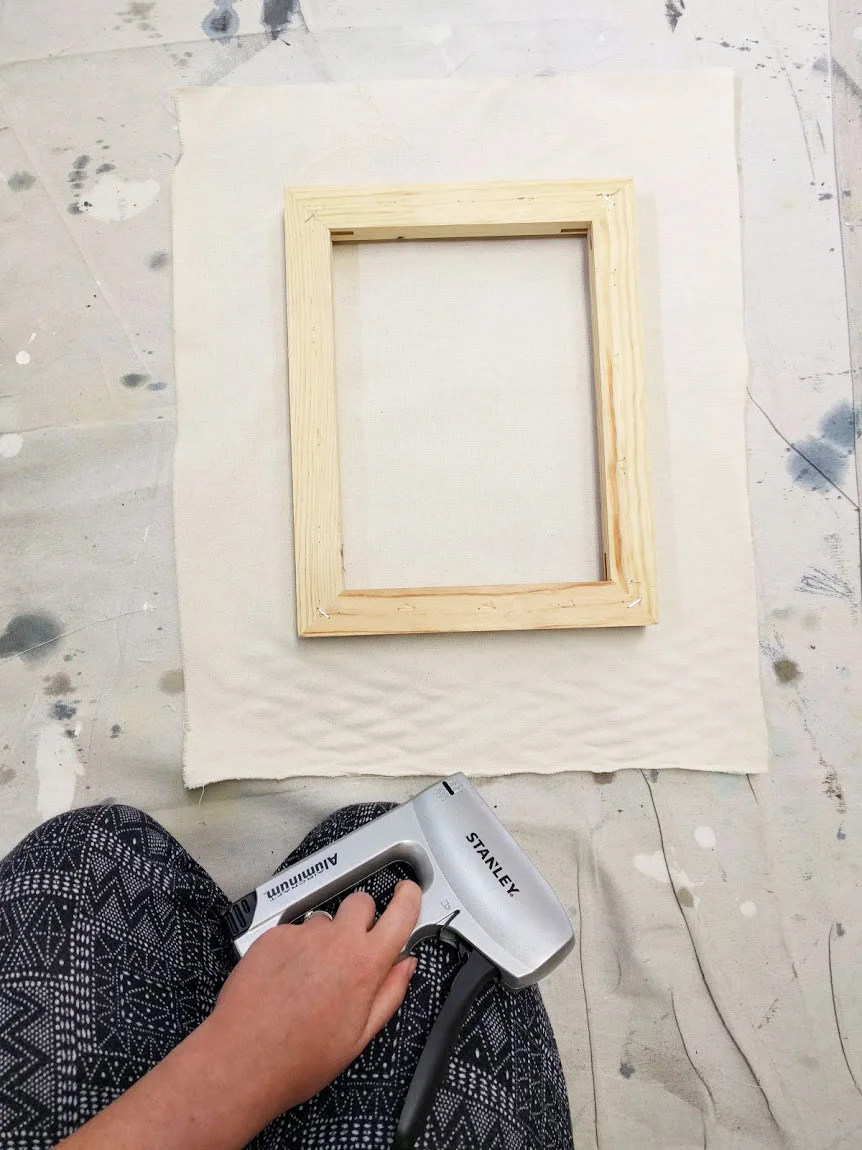
Step 4: STAPLE!
Place the first staple. I put mine in at an angle so it won't tear with the grain if it happens. Turn the canvas 180 degrees, and put in the next staple, pulling the canvas taut either with your hands, or the canvas pliers. (Pliers make the job easier on your fingers/knuckles)

Step 5.) MORE staples!
Keep turning the canvas until each side has one staple, making a cross pattern of stretched canvas in the middle. From here, add one staple to each opposite side and continue to work your way out to the corners.

Step 6.) EVEN More Stapling!
Continue stapling until you get an inch or two away from the corners. With bigger canvas you can leave closer to 2, but I usually ballpark about an inch for anything smaller than 18 x24. The canvas should be stretched taut until the corners where a bit of rippling is fine, we'll pull it when we do the corners.

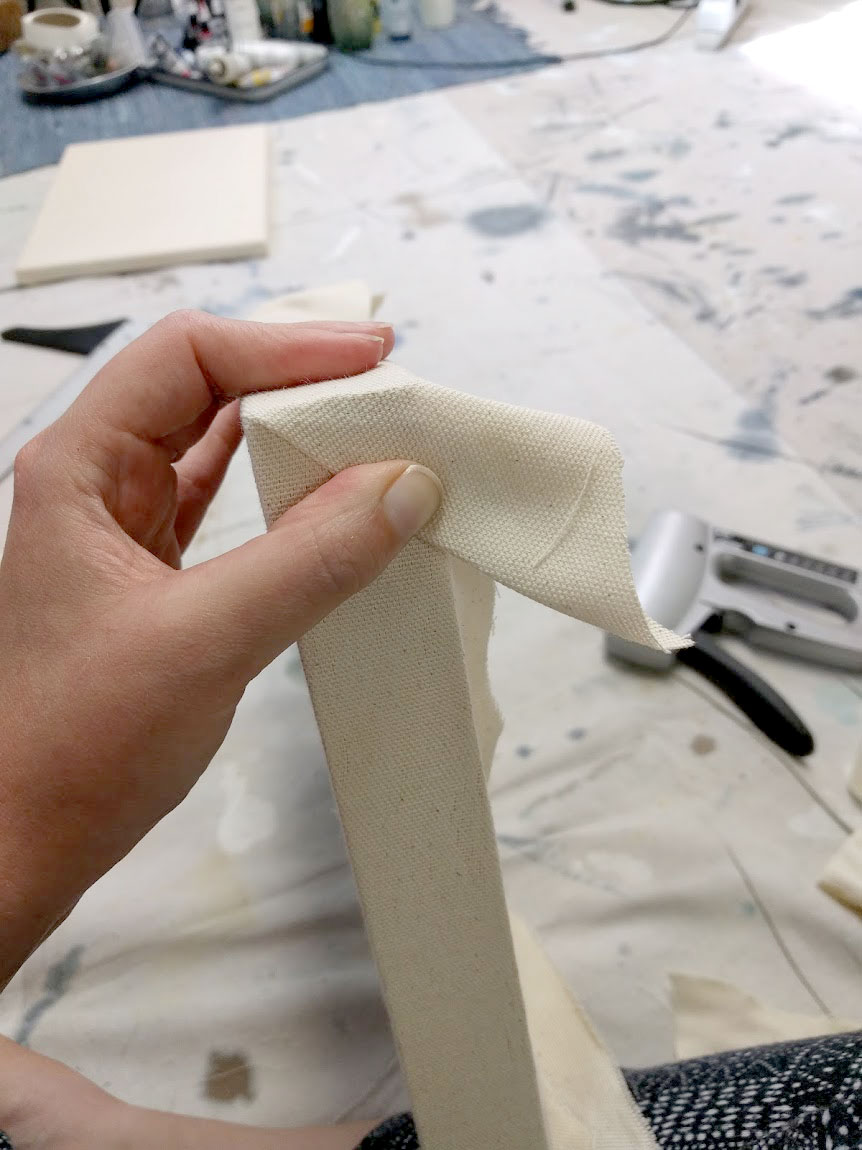
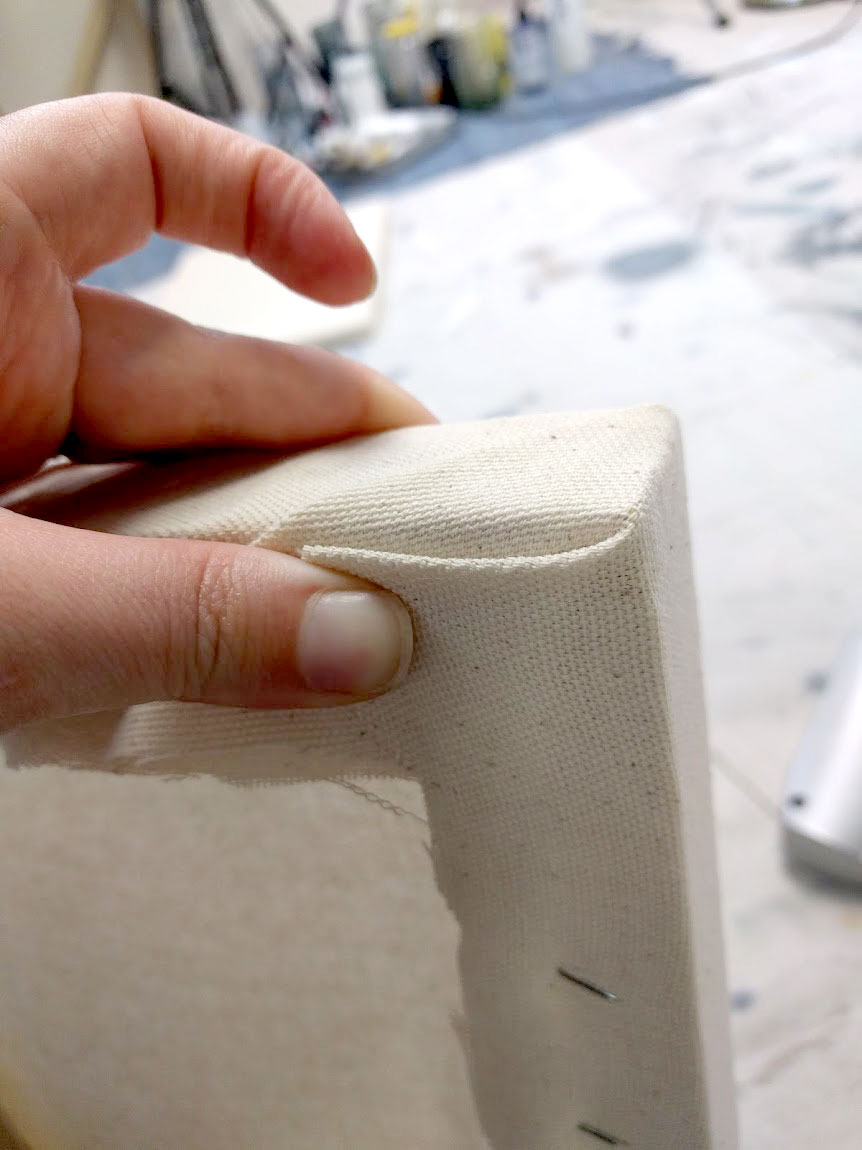
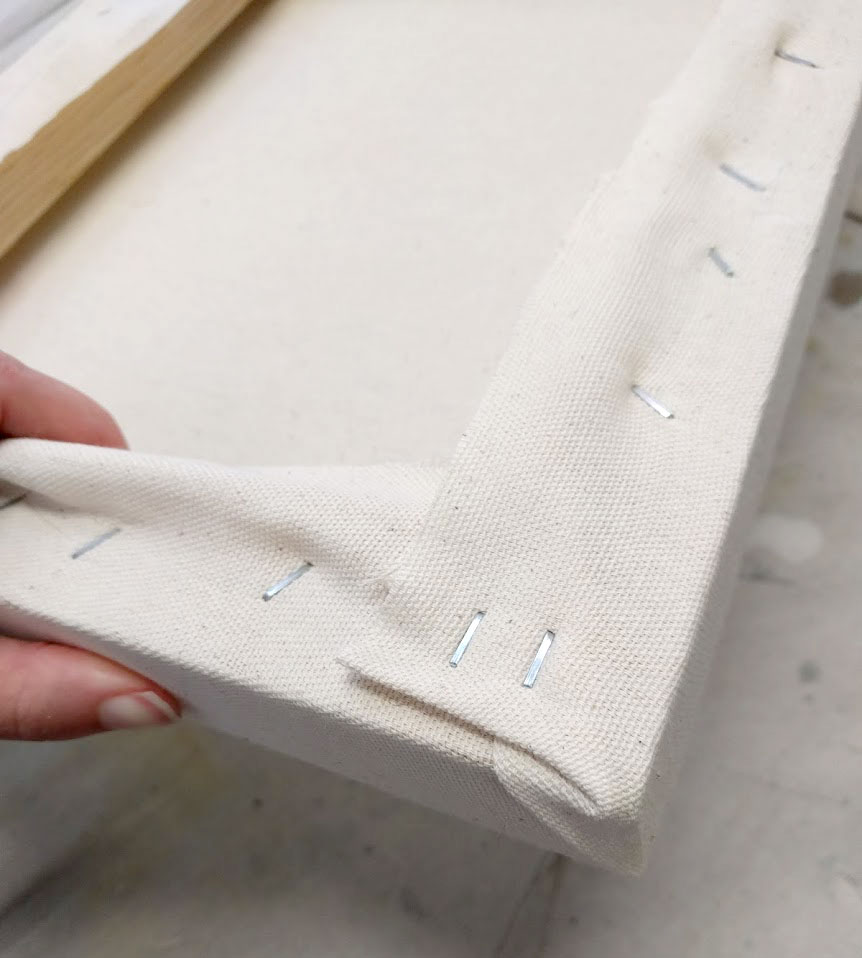
Step 7.) Corners
Everyone has their own method of doing corners, I personally prefer the diagonal 'giftwrap' edge - but feel free to play with the corners and do what feels right. For my corners, I pull the loose canvas across the stretcher corner to make a point, I crease the point and pull it downwards, then fold the excess back into the pocket it makes and staple down. It sounds much more complicated than it is! There's loads of tutorials on how to make more squared off corners on youtube, if this method doesn't float your boat try one of those.
Step 8.) Bask in the Glow of a Completed Canvas
When turned over, canvas should be pulled tight, clear of any bubbles. If it still has bubbles pull out some staples and try again. Making canvases isn't easy, but once you have a few under your belt you'll get the hang of it.
I'm always so happy to share my process, anyone have something they would like to see written out step-by-step?
<3 <3
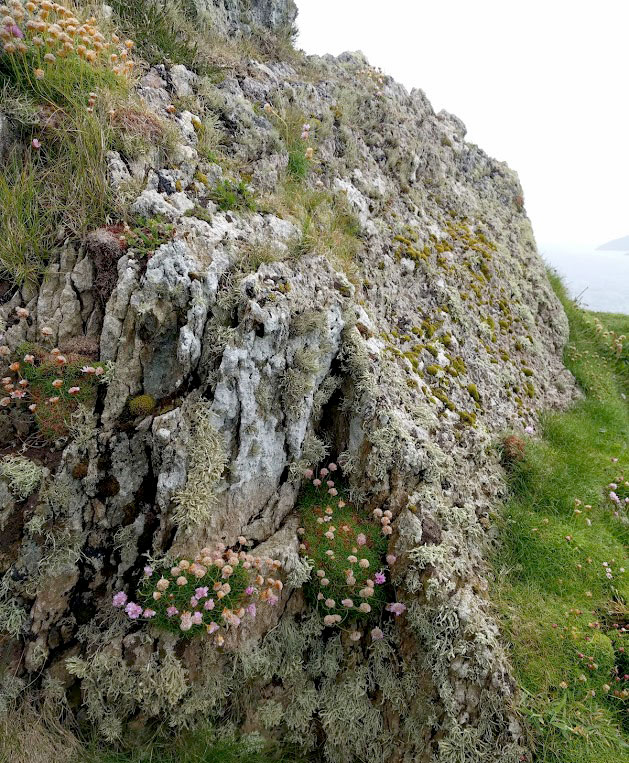
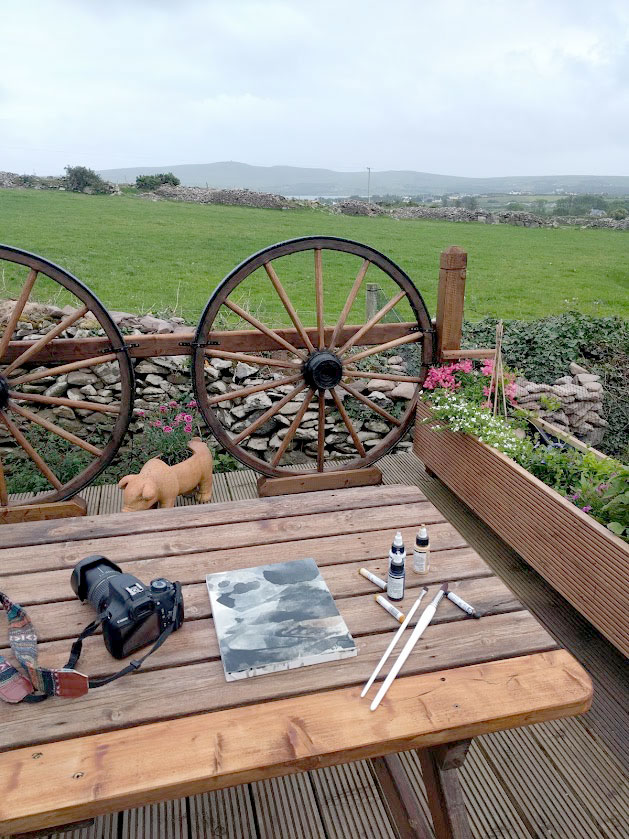
EH Sherman Art Abroad - Making Work in Ireland

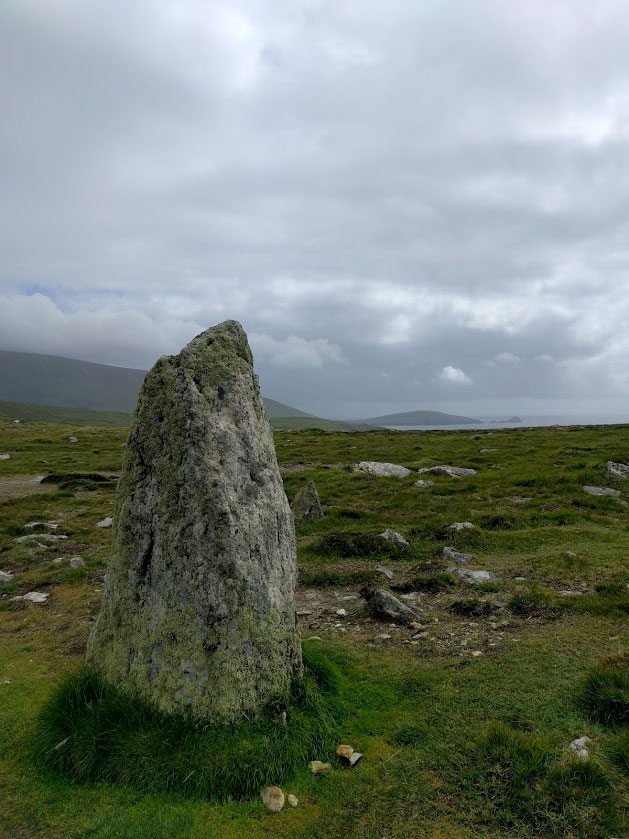
We took a 'circular' path around the island, beginning in Dublin, Carlingford, Belfast, Letterkenny, Castlebar, Cork and back to Dublin. It was an incredible two weeks of sights, sounds, sketching and of course - food.
Spending multiple nights in each location, we took day trips to the surrounding areas as we went. It was a very busy trip, always on the go, but just so utterly fantastic. 99% of the places I've visited I've fallen in love with -- but Ireland just might come out on top.
Perhaps it was the small towns, connected by narrow winding roads and divided by nothing but stone walls and sheep herds that felt like a moment back in time, maybe the overflowing warmth of everyone we met, maybe the jaw-dropping vistas. Or more likely, a combination of everything above.
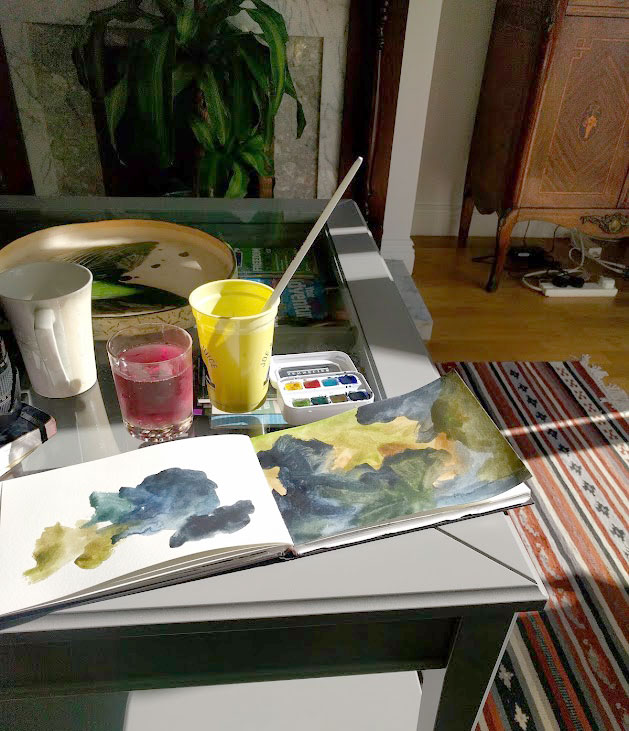
When I wasn't taking pictures, I was sketching and painting. Filled with a new appreciation for greens, grays, blackish blues and tiny dots of purple I worked furiously to express what I felt looking at the landscape.
Every time we rounded a bend it seemed like there was another valley, another mountain that called to be explored. Like a carrot on a stick. A big, beautiful paleo-lithic carrot.
I could have spent another 3 weeks there, easily. Or longer. But I only really had 3 weeks of clothes with me, sooo...
It was just the most fantastic time. And I truly enjoyed getting to talk with some of you on a few of the car rides via Instagram Live, being able to show my process in the car was just such a neat experience. (Follow me @ellen_the_lemon for the next Live video!)
Now that we're back and I'm settled into the organization of the work I made, I can't help but think wistfully on the slow mornings spent waking up to mountain haze, listening to the sheep and smelling the seashore. I'm grateful for all the wonderful suggestions we received on what to do, what to see and what to eat, you guys had some truly fantastic advice!
I'll be posting a major shop update in the coming days, (featuring the works made in ireland!) sign up for the newsletter to be notified the second it goes live.
Hope you all have a wonderful weekend <3