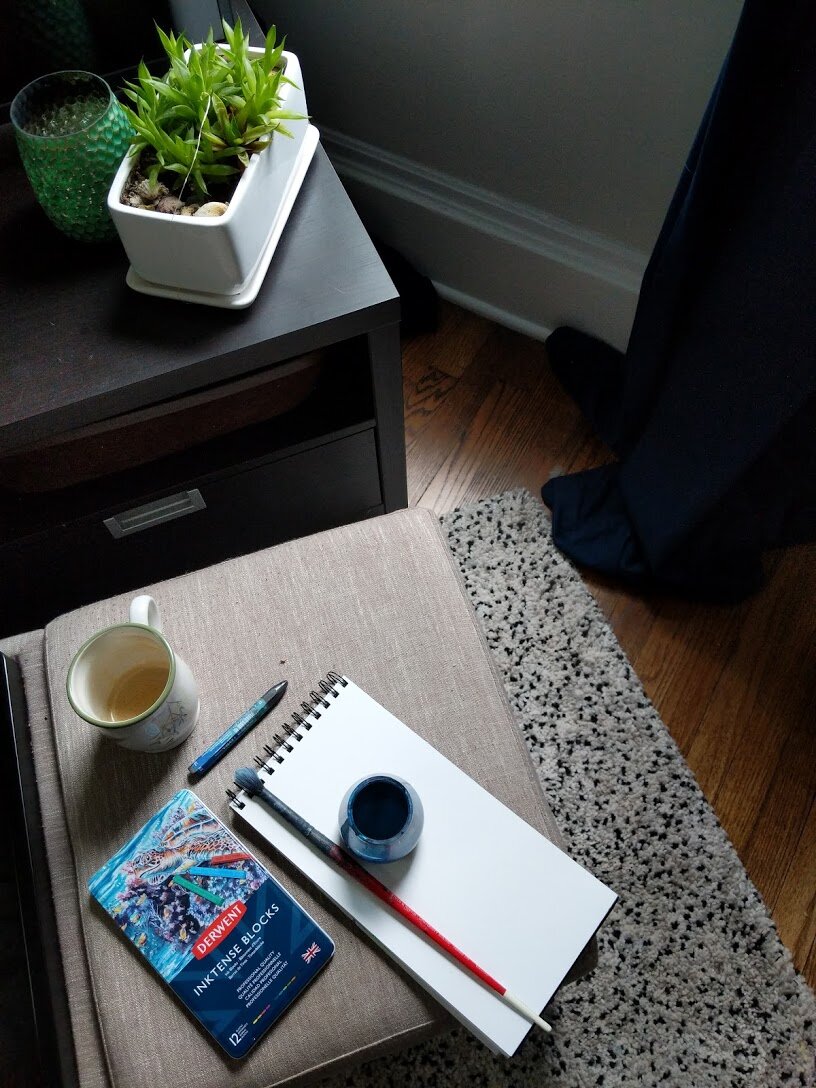
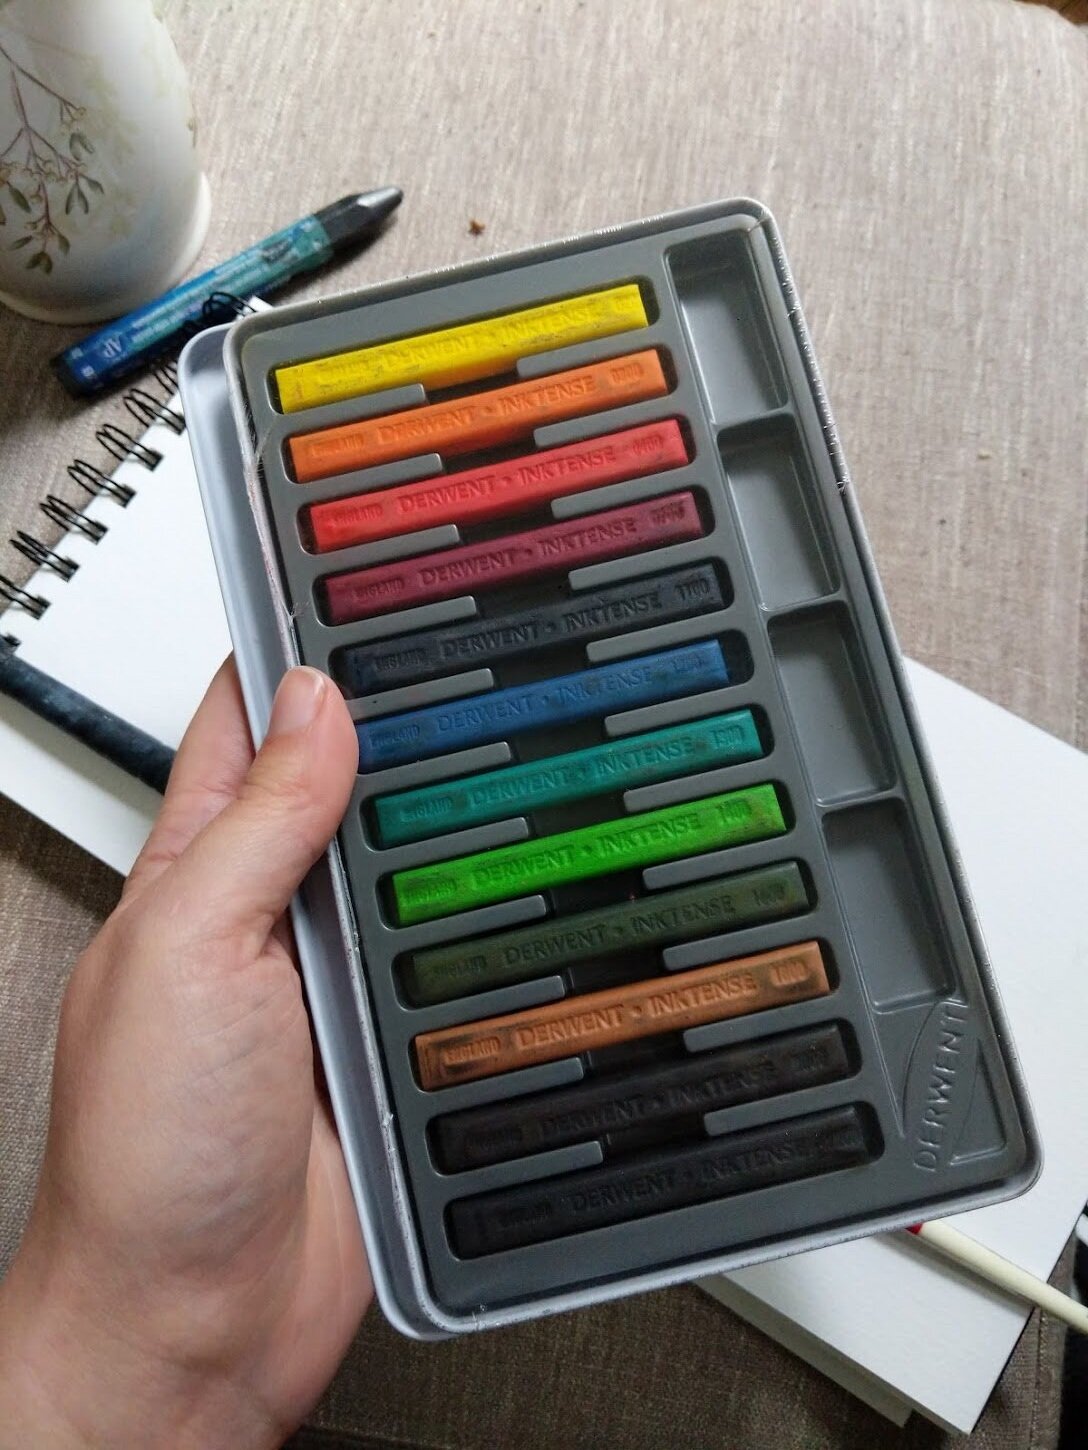
Trying out the Derwent Inktense Blocks
(Not sponsored, just excited to try out new materials. This post does contain affiliate links, if you’re interested in trying out these blocks consider purchasing through the link. No extra cost to you, but Amazon sends me a few bucks!)
I’m hoping to plan a weekend getaway soon - we’ve all been cooped up in here for most of the summer and I am ready for a little adventure.
Of course, as with every adventure my supplies come along for the ride - but if we’re gone for just a few days I don’t think I want to bring EVERYTHING I usually do. I might just concentrate on making a few small sketches while away instead.
To this end I picked up these water-soluble ink blocks from Derwent and I’m excited to try them out. They are certainly packable, and if they are versatile enough I might bring these and no other paints.

Dry block, with a bit water
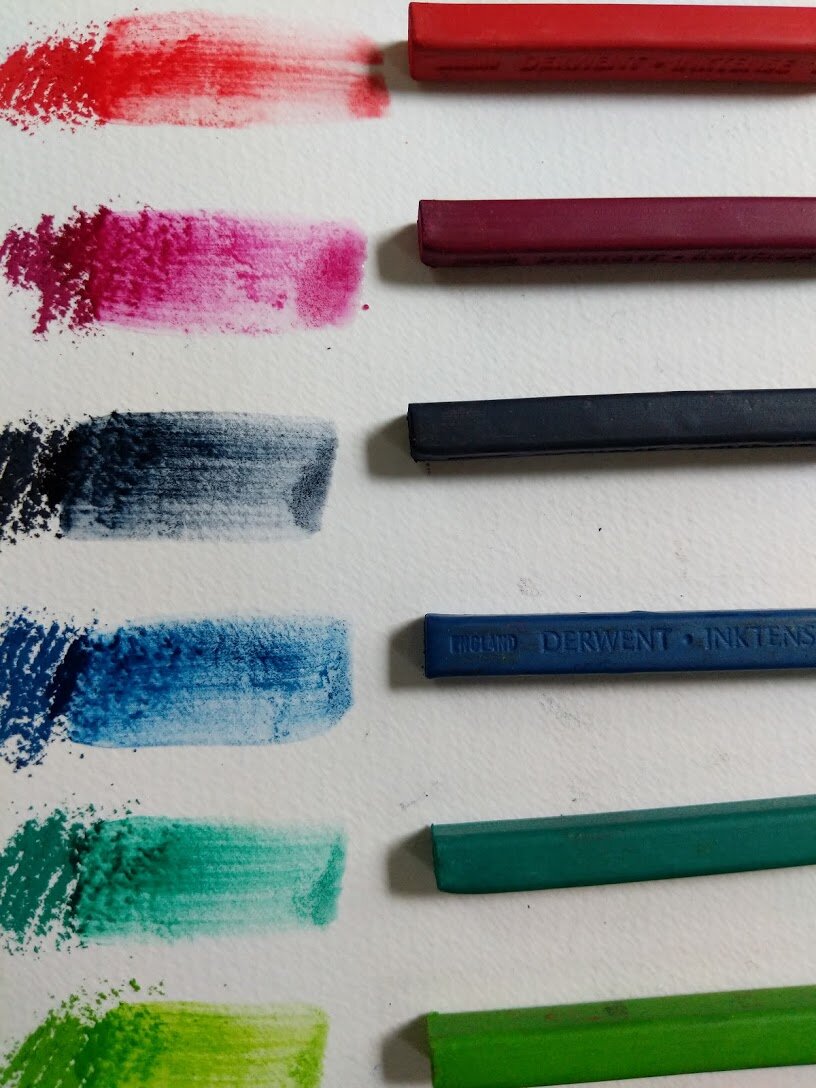
The block are really vibrant dry AND wet.

Testing the layers/translucency
I’m really happy with hows these performed.
Really beautiful pigment when dry, and with water it’s easily blendable and layerable. Perfect for my purposes and exactly what I was looking for in a small set of travel paint/pigment.
We may not have the destination picked out yet, but at least I know what supplies I’m bringing along.
<3 <3
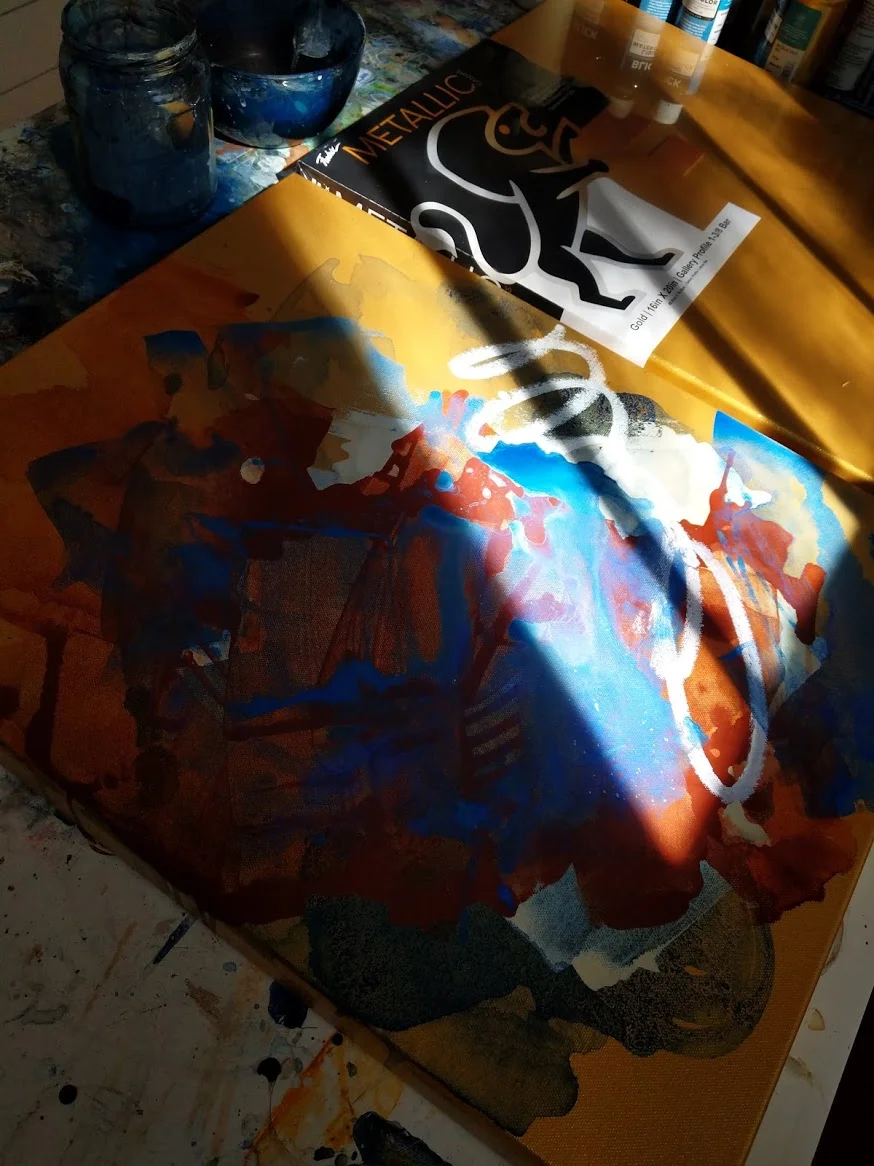
Paint tests on Fredrix Canvas METALLICS!
Whenever I try out a new surface I always dedicate one to absolute experimentation.
I use as many paints as I can in an attempt to learn the surface and see how it reacts to my materials. It’s always messy and usually not great looking at the end, but always fun.
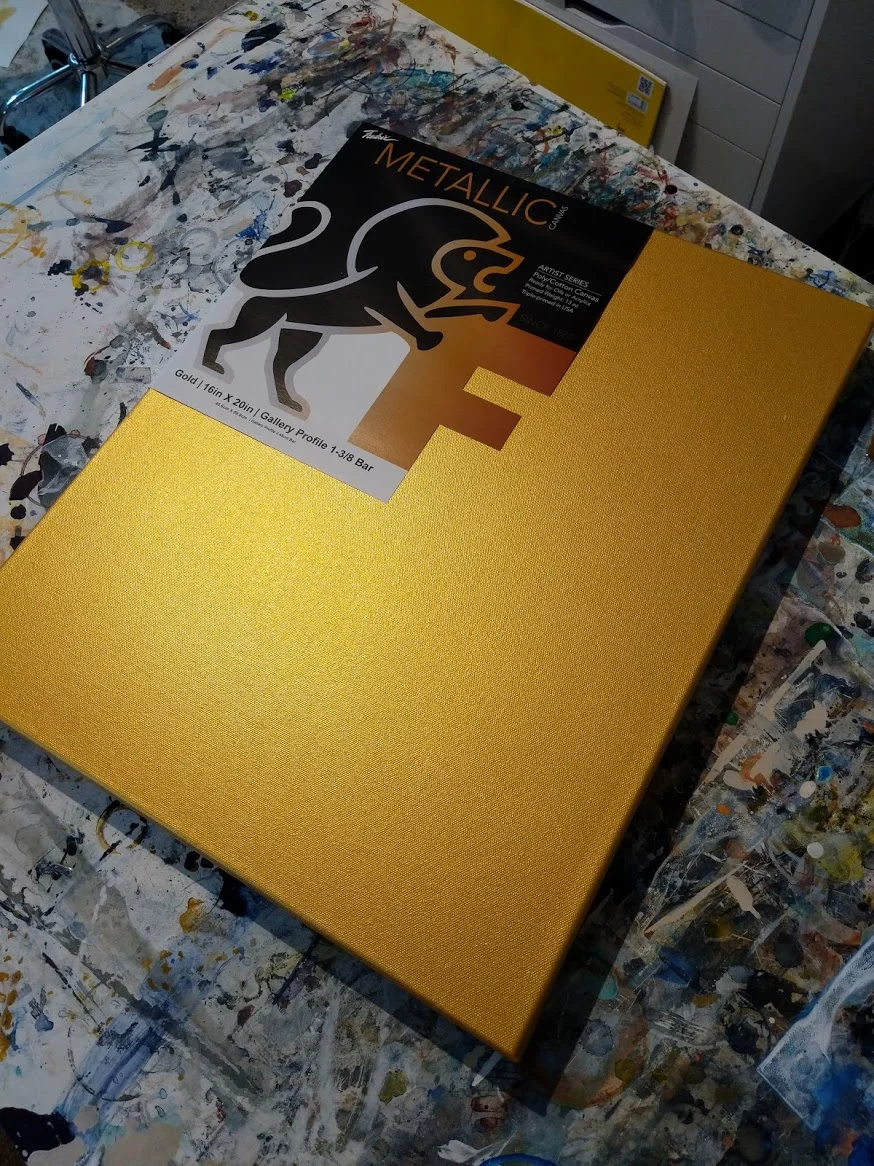
Look at that SHINE.
This is the metallic gold canvas, from Fredrix Canvas. It’s a 13 oz poly/cotton canvas that has been triple primed with a universal metallic gesso (either in gold or pearl) and it’s GORGEOUS to behold.
I haven’t used too many pre-painted canvases before, so I definitely wanted to make sure and do an experimentation round first.
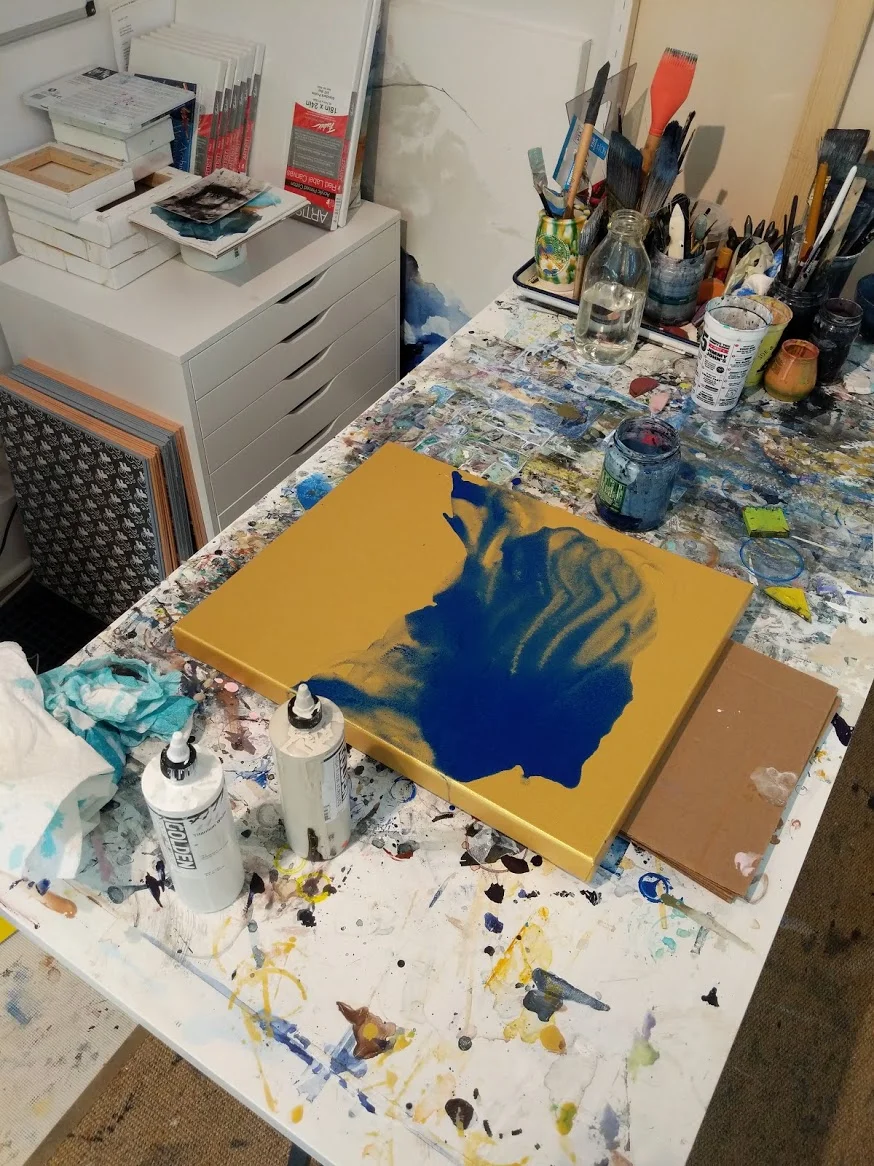
Layer 1: Thinned acrylic
I didn’t have a plan when I started (the key is experimentation) so I just started mixing and putting down various layers. This first one is a heavily thinned acrylic (water + glazing medium) to see how the gold comes through a very light wash of pigment.
Layers 2 and 3; Golden Hi-Flow (unthinned)
After letting the blue dry I added two layers of Golden hi-flow paint without diluting either color. I’m loving how the sheen of the canvas comes through these first three layers.
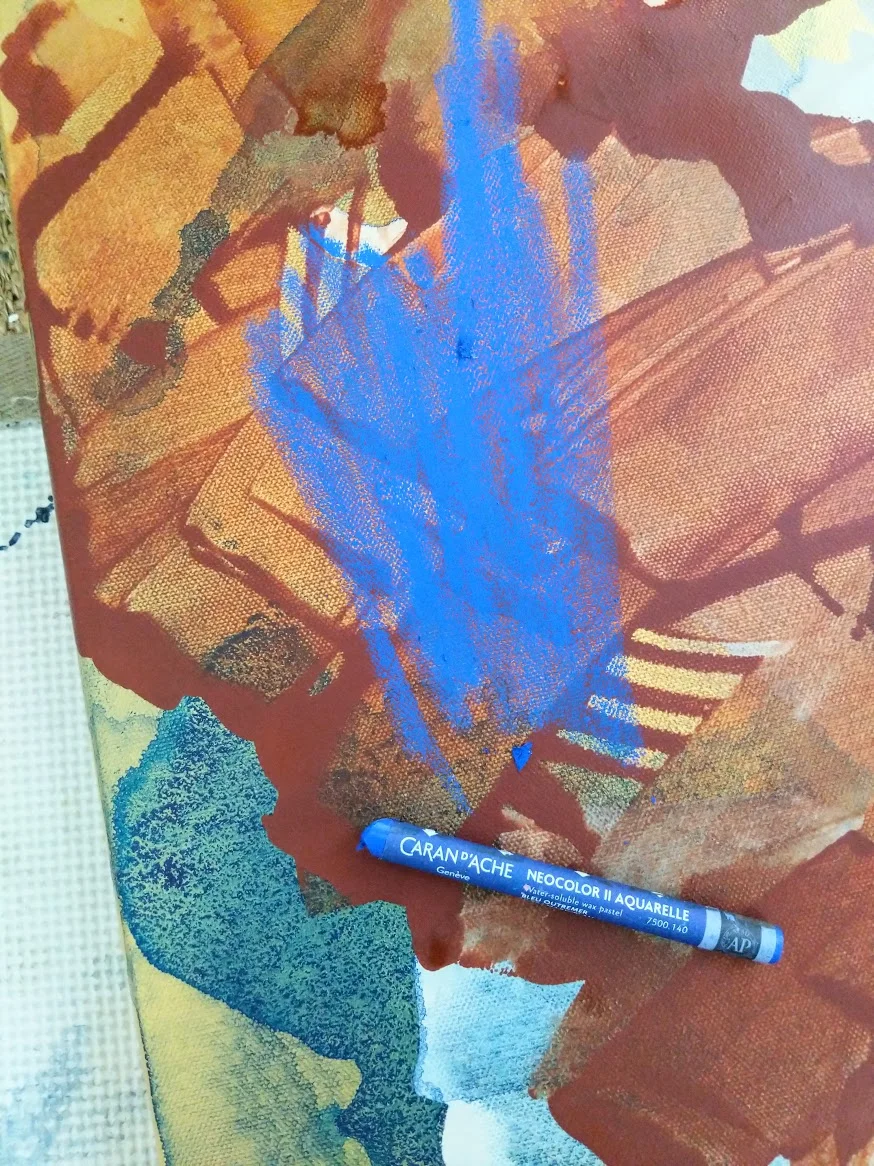
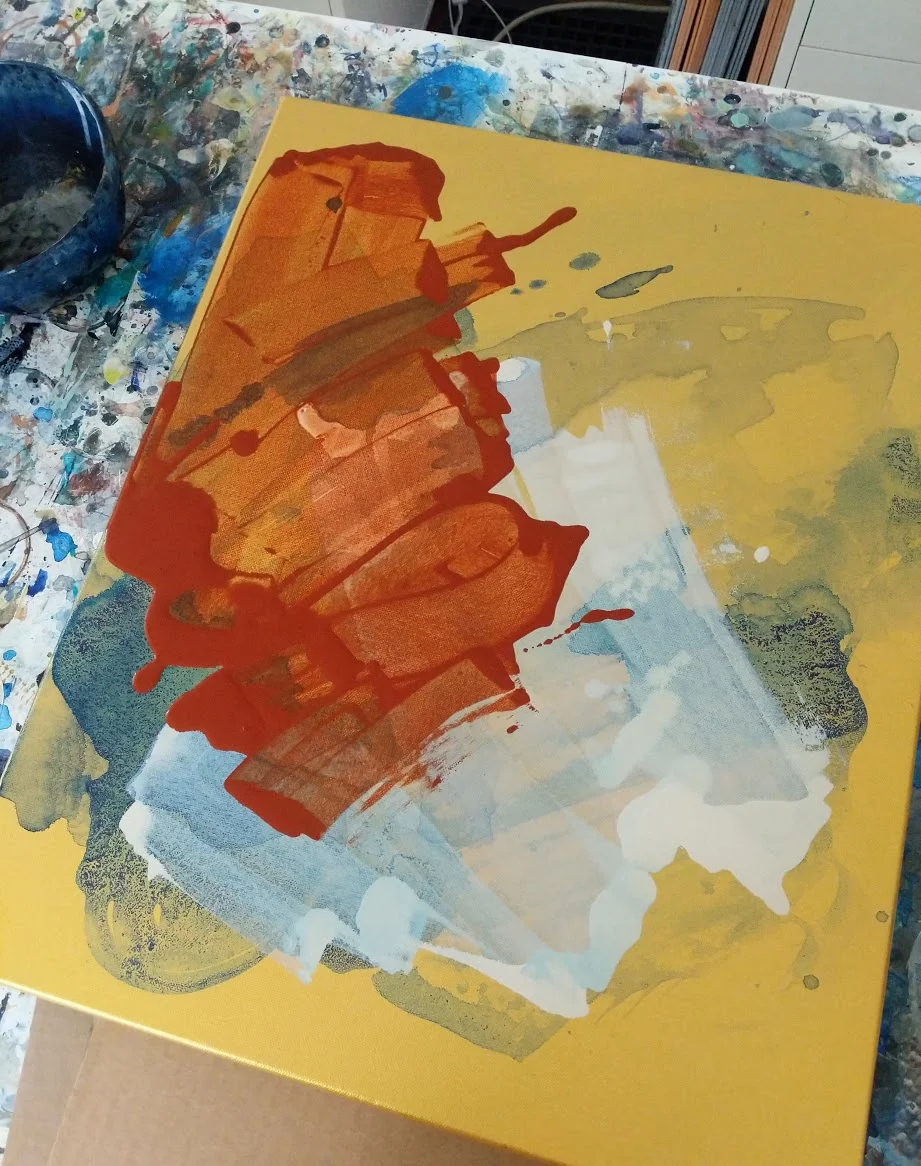
Layer 4: Watersoluble pastel
Next up is a bit of water-soluble pastel. I added it with a relatively heavy hand as I wanted as much pigment as the crayon could muster.
Layer 5: tempera stick
After the water-soluble pastel dried, I wasn’t too excited with it. Just a bit too thick and really seemed to cancel out the metallic sheen. I made a note to stick to thinner paints going forward - I love the metallic hints through the layers so I definitely want to preserve those.
I added a few circles of tempera stick next (bottom right of the canvas) and was pleased with how smoothly they applied to the surface. Again though, just a bit too opaque - so I probably won’t use these heavily on a real painting, but good for small details and line work.
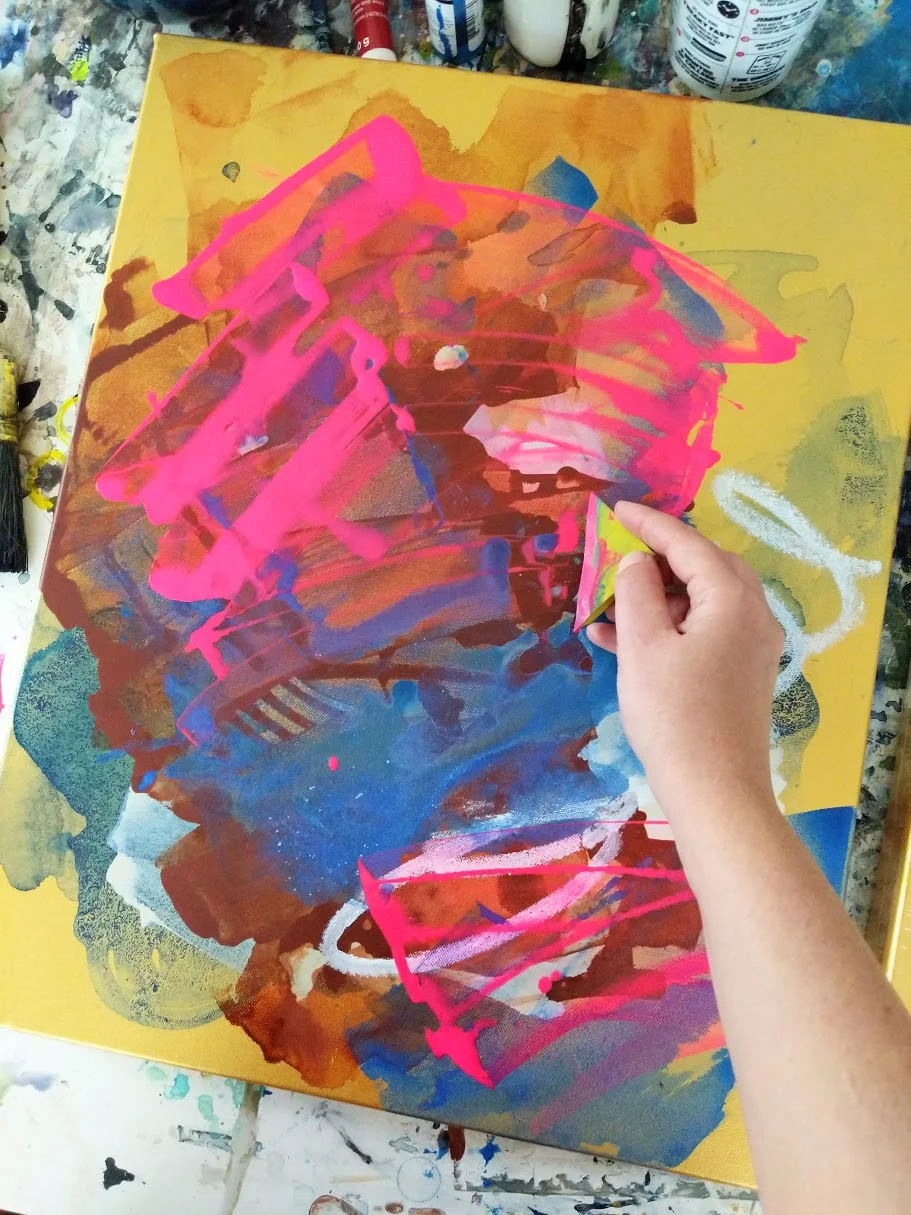
Layer 6: slightly thinned florescent!
And finally I added a last layer of ever-so-slightly thinned florescent pink acrylic. I was curious how the bright color would interact with the metallic under the layers, and it’s definitely something I want to pursue further.
I’ve got a few ideas for sketches that I think would translate well to the gold surface, so I’m excited to move on to a little more serious work on these.
Have you tried a metallic canvas before? I’d love to see what you painted on these!
Supplies for Sketching Outside

Gathering my supplies!
I love working outside. I try to get out in nature to sketch as often as I can (though with our new pup it’s been a little harder to get away recently! ) and I’ve been meaning to check out our local botanical gardens (Matthaei Botanical Gardens) so I thought I might head over there for an afternoon.
When I’m doing little day trips like this I try not to go overboard on bringing supplies and just keep it to what I can carry in one hand + backpack. Especially if I want to walk any trails; carting a lot of paint around can be sloshy, heavy and potentially very, very messy.
Here’s what I’m bringing today;
(Some links below are affiliate links, so if you purchase using that link there’s no additional cost to you, but a little comes back to me to help keep this blog going!)
Paper;
1.) 18 x 24 Strathmore Watercolor paper
2.) 9 x 12 Strathmore Watercolor paper
3.) 4 x 12 Watercolor sketchbook
4.) 9 x 12 Watercolor sketchbook
I bring multiple sizes of paper and sketchbooks so I can work quickly, moving from page to page as the previous one dries.
Tools;
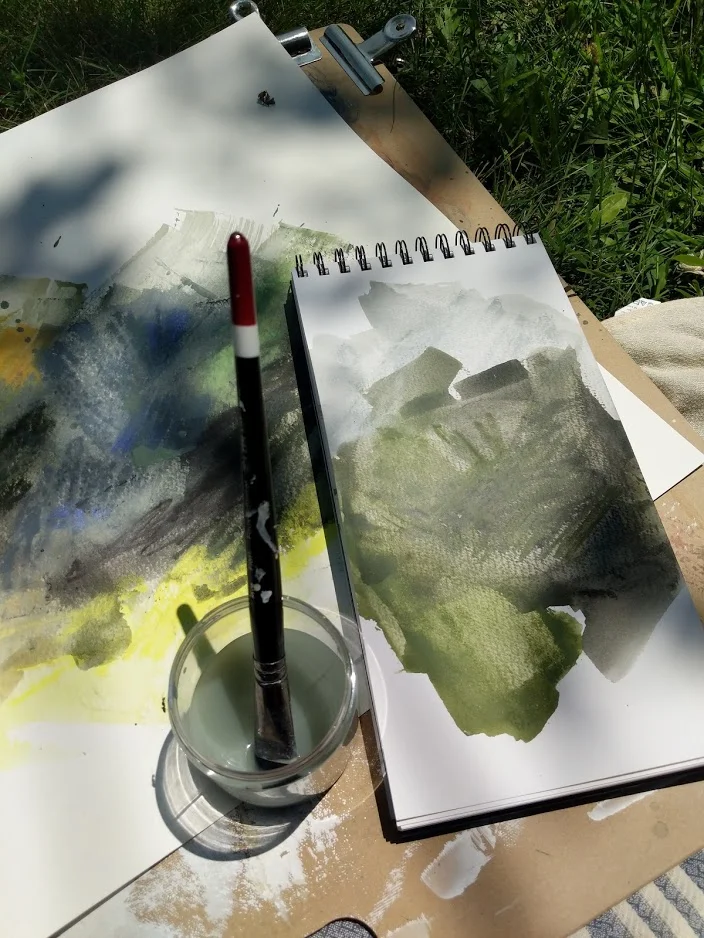
1.) Lyra Watersoluble Graphite (9B)
3.) Caran D’ache Watersoluble pastels
4.) Zen Art Black Tulip Watercolor Brushes (faux-squirrel)
5.) Empty water containers x2 (recycled from Sunbasket delivery)
On little outdoor adventures like this, I don’t bring any liquid paint. Just the watersoluble graphite and pastels, which apply dry and when water is added they become watercolor-esque.
Extras;
1.) Caftan throw (for sitting on, or shielding from sun)
2.) Sudio Earphones (bluetooth headphones for maximum concentration!)
I ADORE these earphones. I talk a bit more about them on my instagram story, but these have been a staple in my bag for the last few months. I always forget to plug in blue tooth headphones, resulting in dead batteries and no music. I’ve had to plug these in twice since getting them and they are still full battery. Small and super comfortable to wear, they go with me everywhere now. AND! If you want to try a pair for yourself, use code: ellenthelemon to get 15% off your order!
Not-pictured;
1.) Sunscreen
2.) Waterbottle

All the supplies fit!

Everything is coming with me - except the pup. The botanical gardens do not allow the doggos.
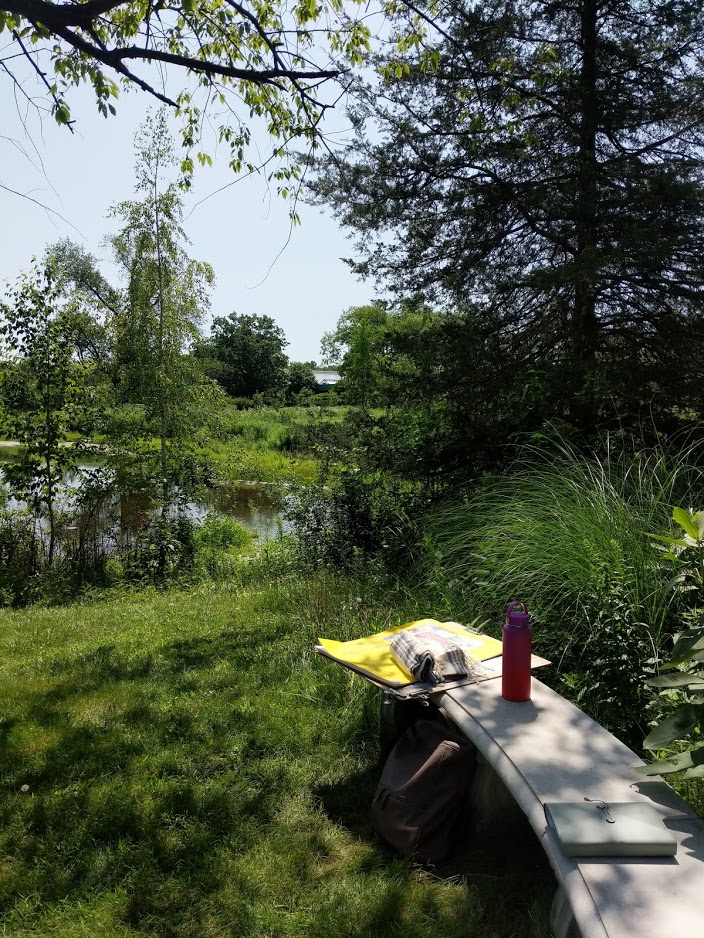
I walked for a bit before I found an area a little ways off the trail, with some shade (because I burn SO fast…) and some grass to lay out drying work.
I like to sit in the space for a few minutes first, take in the smells, sounds and try to connect with the moments I want to sketch. For today I mostly focused on the reflections in the water, the ripples made by passing turtles and the way the sunlight sparked along the edges of the pond.

First I made a few color swatches, mixing and matching the water-soluble pastels to align with the colors of the pond. A note here - try not to let the pastels be in full sun for long, they tend to get soft and can break easily. I usually pull out a few to work with, then put them back in their tin inside my bag, rotating through so none get too damaged by the heat.

Onto the big paper!

I use my headphones outside to keep me focused, but I don’t play loud music. I love to hear the birds, the frogs in the water, the sound of the wind in the trees - but could do without the noise from the parking lot. When I’m working outside I play the same thing on repeat; just loud enough to direct my thoughts but quiet enough to still hear nature. Elder Scrolls IV: Oblivion (just the peaceful songs, I made a playlist without the fight tracks) is my old faithful.
I made a few more sketches, a few more contour studies and then packed up for the afternoon and headed home.
I wanted to make it over to the conservatory - but that will have to wait, it’s time to walk the pup <3

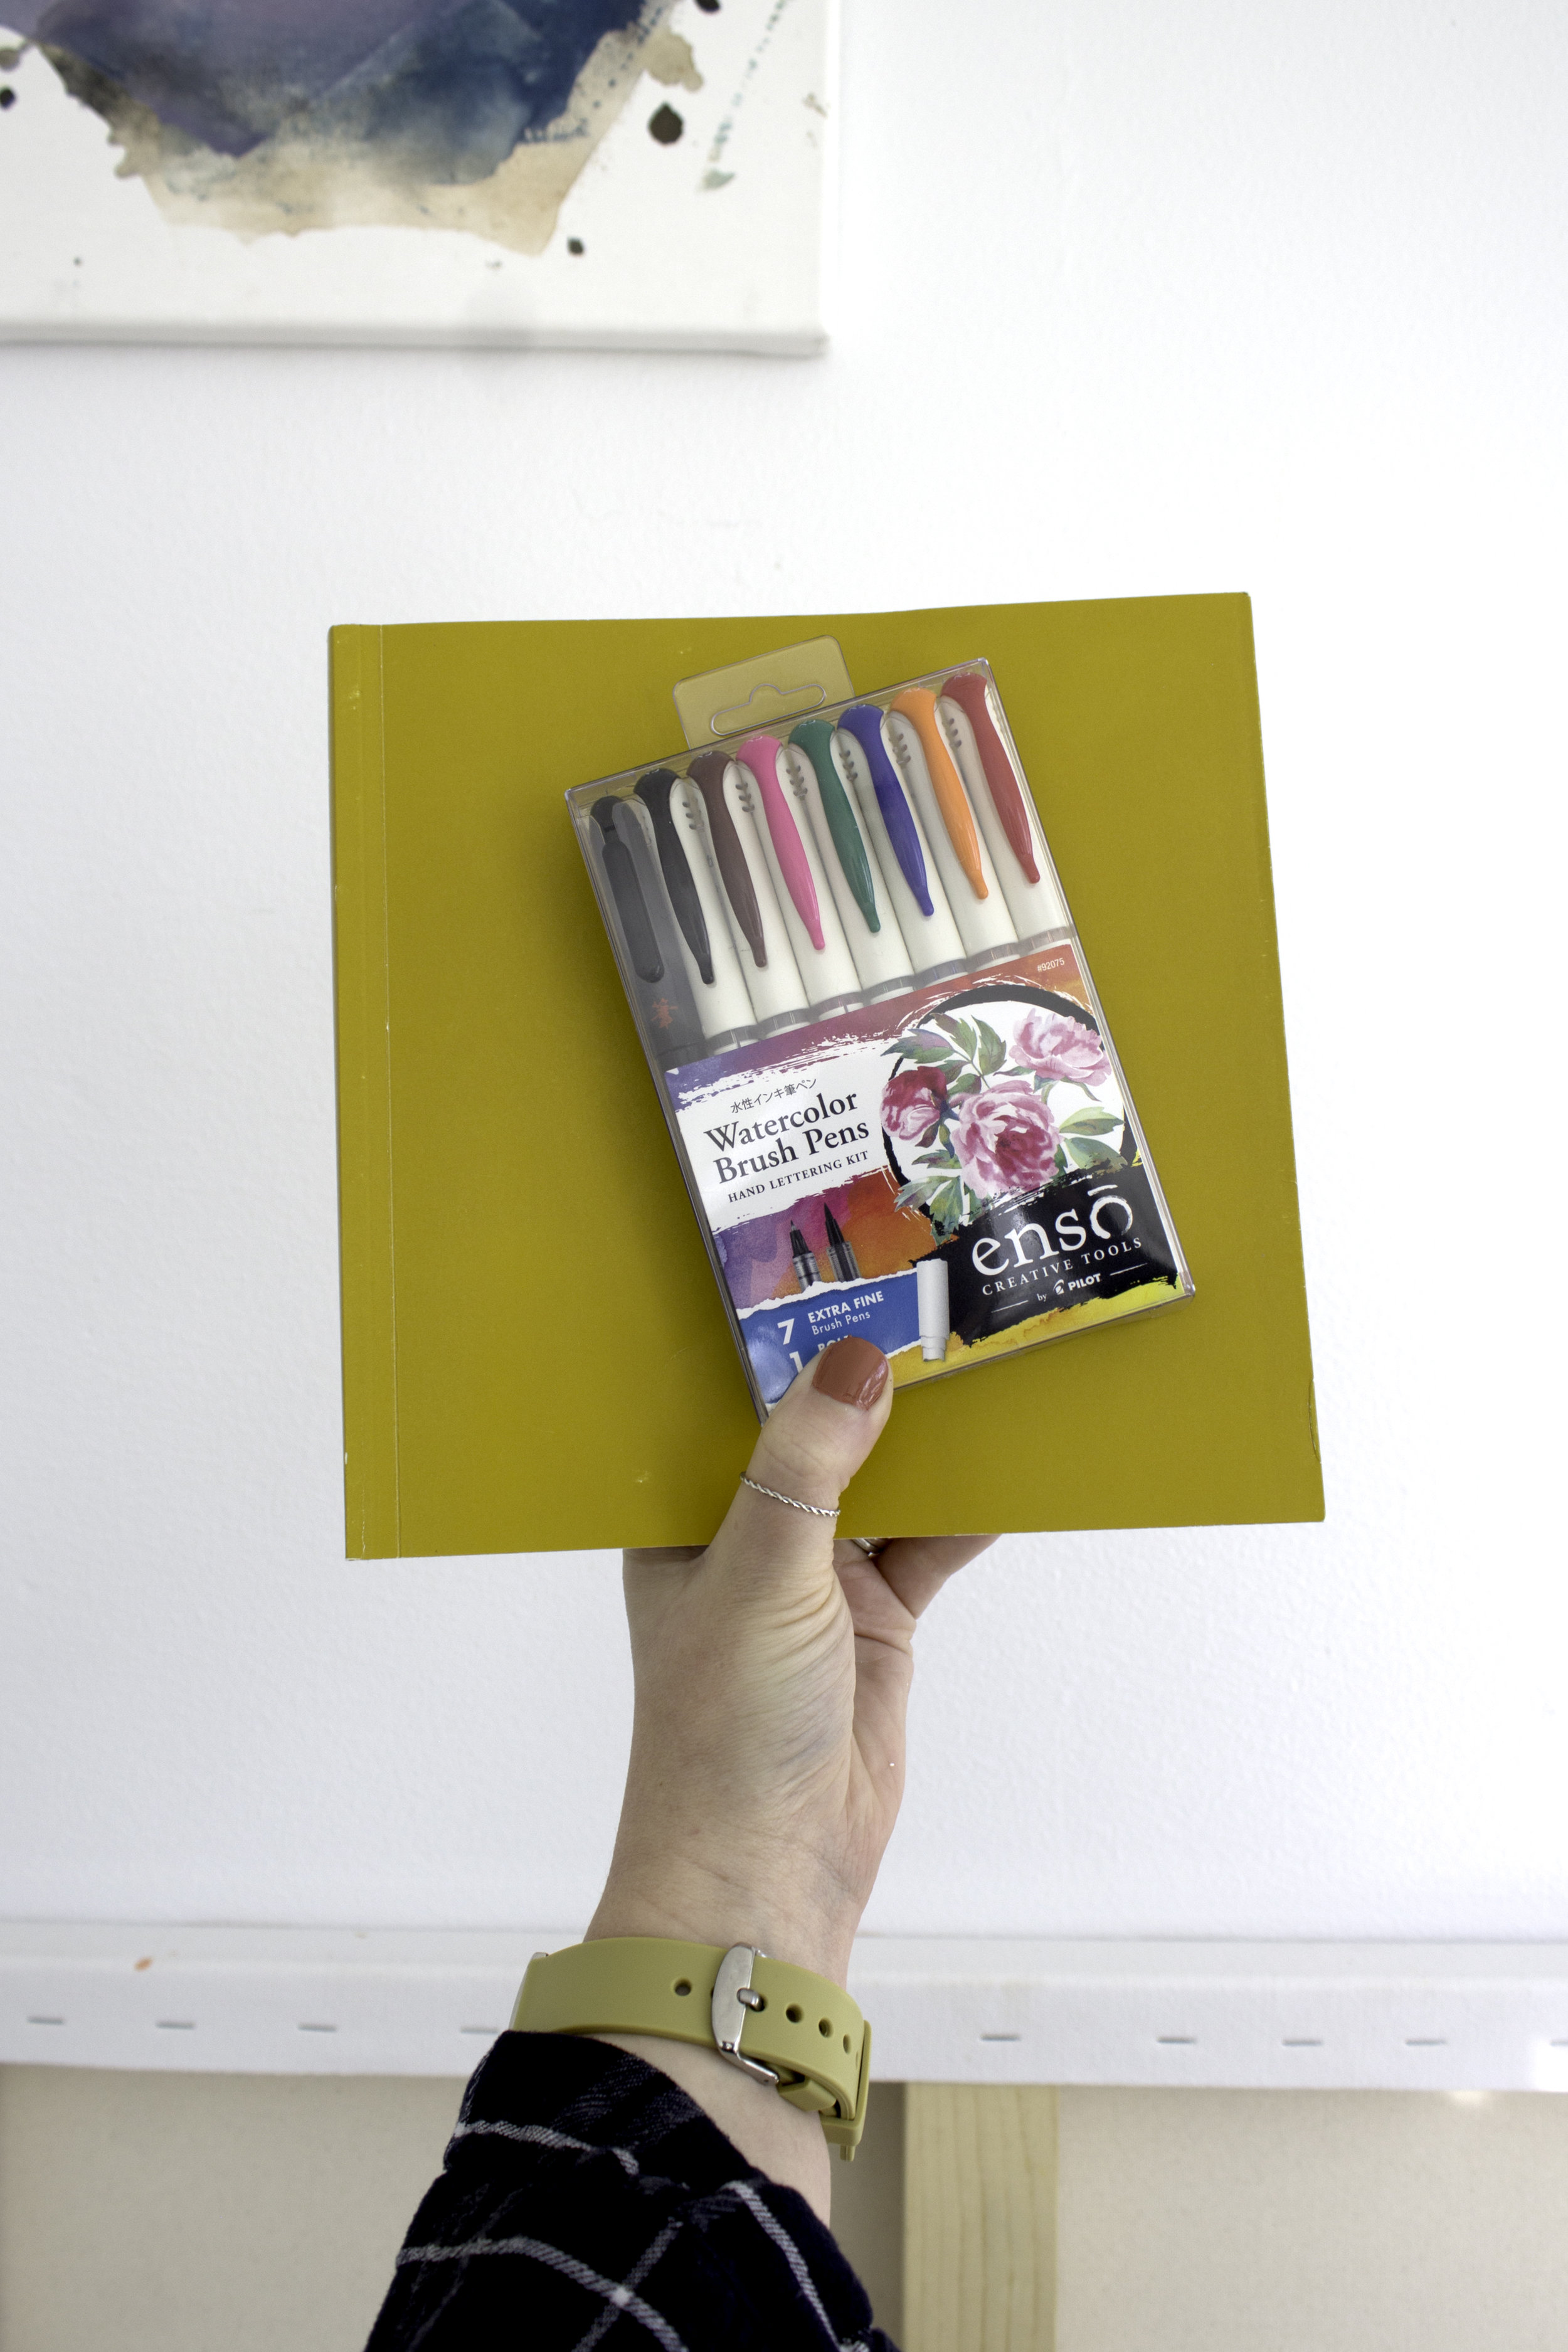
Studio Intentions with the New Ensō Collection from Pilot Pen
(Thank you to Pilot Pen for kindly sponsoring this post! All opinions are honest & completely my own. I never work with a sponsor or product that I don’t love. <3 )
On most days I can be found working to balance multiple painting projects, a commission or two, website updates, art event planning, house remodeling adventures… things can get a little chaotic here relatively quickly. To combat the pull of the messy, paint-y abyss I keep a studio planner and strictly manage my time, but that only covers the physical, actionable parts of the tasks and goals I have set.
One of my goals for 2019 was to work on visualizing the emotional, bigger picture, intangible and abstract responses to the day as well. In the same way I would brainstorm and examine how to tackle a project, brainstorm and examine my hopes and plans for my painting practice.
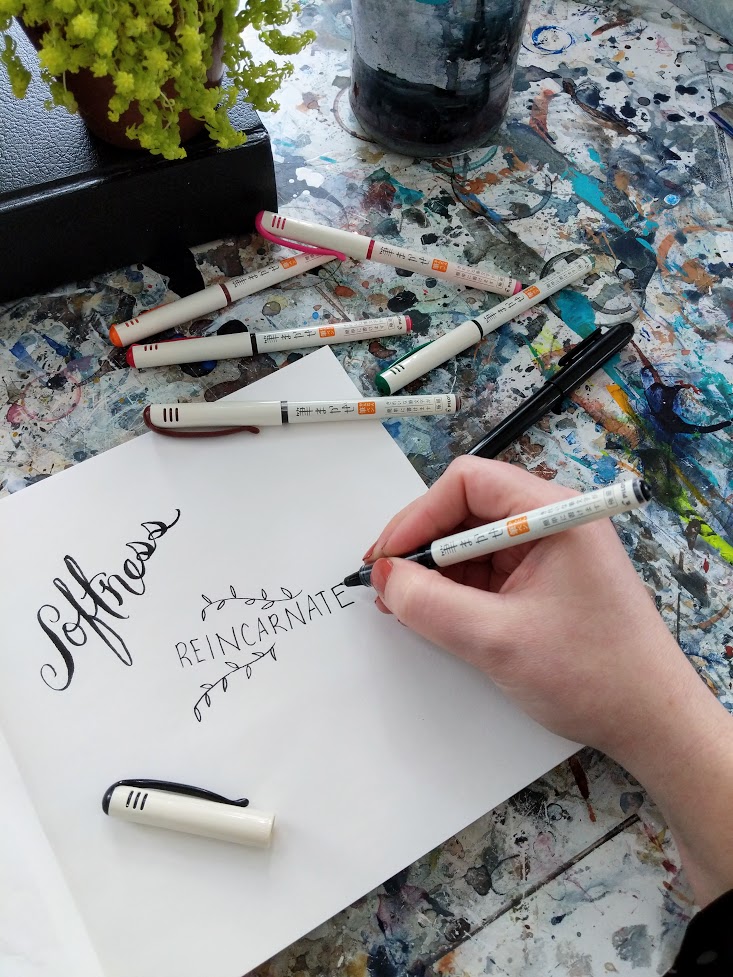
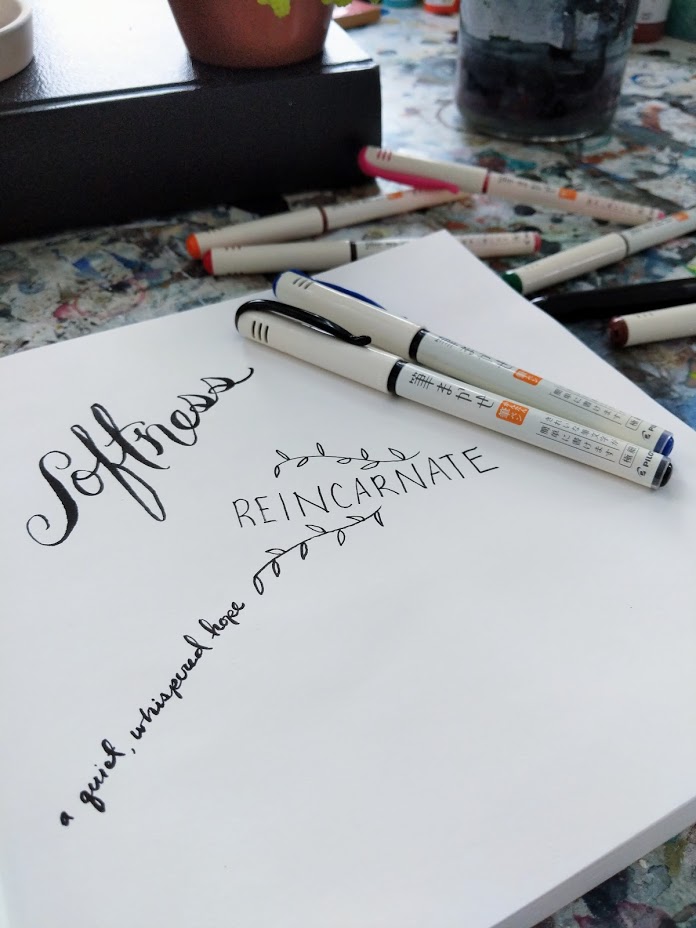
So I started recording my studio-intentions.
I mean ‘intention’ here in the way a yoga instructor might; these non-concrete thoughts that embody the ideals for the day, week, year or beyond with essences that I can reach for and visualize. These serve as a reminder that though there are physical steps to complete projects, frame of mind is just as important. Some are solitary words, some are short sentences. What matters is how I connect with and reference them throughout the day.
So when Pilot Pen reached out to me about working together, I knew exactly how I would use their new Ensō Collection of Watercolor Brush Pens.

The kit features 7 super vivid and precise felt tipped pens (black, brown, red, orange, blue, pink, green) and a black pen with a very long brush tip for sweeping lines and shapes. Using these with varying amounts of pressure I can create a number of different lines, exploring and defining the nature of the word, learning from it and emblazoning it on my practice for the day. I’m able to just play and create knowing the pen is going to give me amazing control and beautiful color.
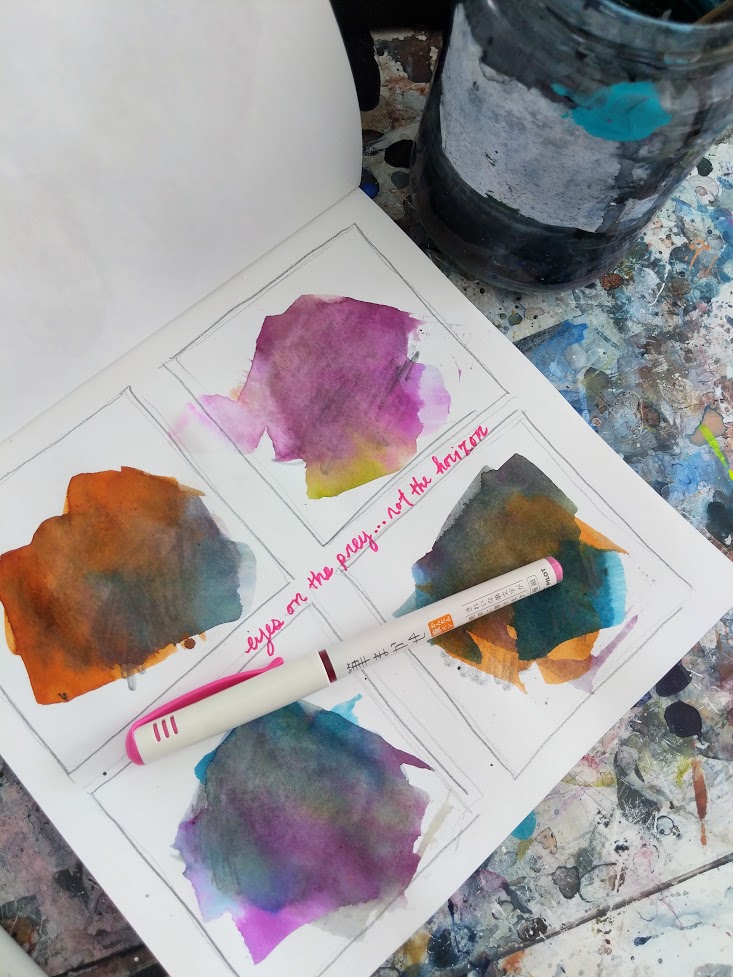
The pens write beautifully and effortlessly, letting me focus on the design and nature of the word. I record these in a number of different sketchbooks; scribbled on top of old paintings, hidden in the margins, wrapped around sketches and the rich, vibrant ink allows the words to stand out in the chaos. The fine-tip allows me to be precise when I want to create fine lines, while applying a bit of pressure helps to create bold, broad lines.
Using the Watercolor Brush Pens as my tools for these intentions has become a little bit of a ritual at this point. Get into the studio, make coffee, find a good sunbeam (or comfortable spot by a plant) and use the Ensō Collection Watercolor Brush Pens to design the intangible goals for the day.

Again, big thanks to Pilot Pen for sponsoring this post, these new pens were fast favorites of mine. Do you have a practice of recording your studio intentions? Do you also love writing out words with really beautiful pens? Leave me a message, I’d love to see how you work these into your practice.

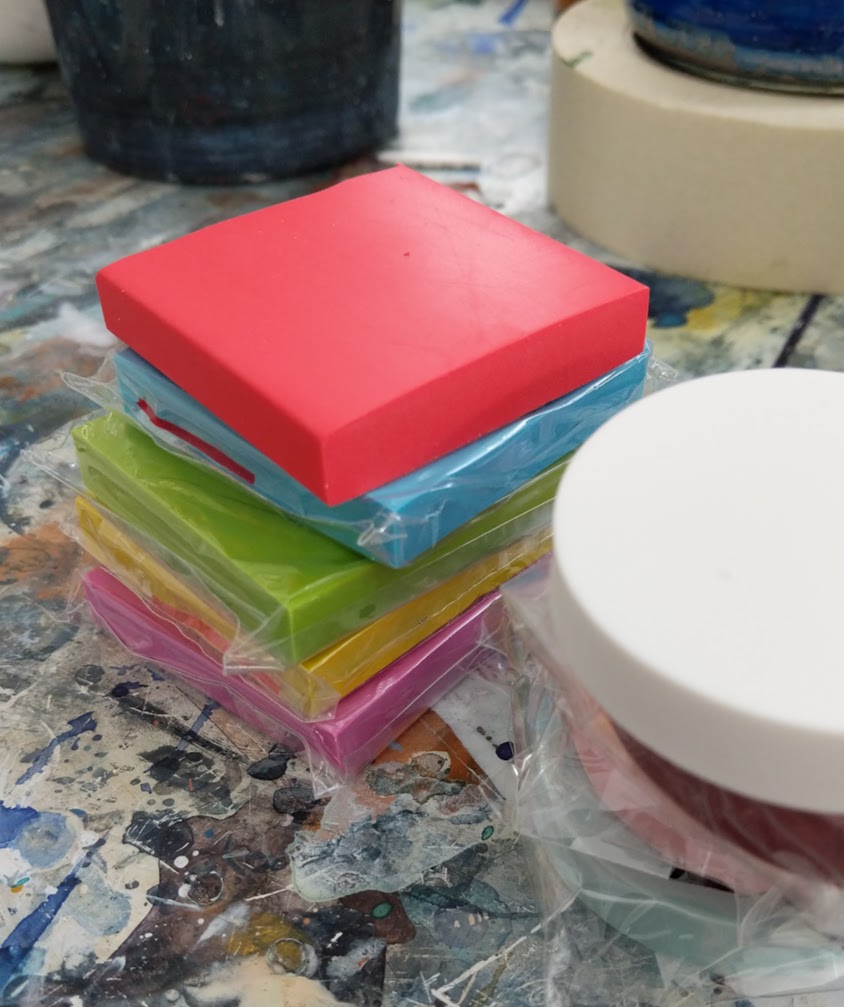
DIY wedge tool!

One of my favorite tools to work with is the rubber wedge. These come in all sorts of shapes and sizes and from a myriad of different brands (for some of my favorites head over to my Amazon page!) but sometimes the mark I need to make is so specific, that I have to form my own.
For this I bought a pack of stamp backs, put a new blade in my exacto knife and got to carving.
Follow along below to make your own!
Materials;
Rubber carving blocks. (I used these)
Exacto knife, or carving tools.
Cutting mat to protect your table (I use old magazines)
Pen
Step 1: Plan your stamps.
Make a few sketches of the marks you want to make with your wedge to determine where your cuts need to be. Or don’t - and just start cutting, sometimes not knowing what a tool will do produces some really cool marks.

Step 2: Cut!
Start cutting into the rubber. As you can see, I am not a master of clean, careful cuts. Thankfully rubber is forgiving. You can decide at this point if you want to keep each wedge it’s own mark, or combine different types of marks on one wedge. I did a bit both, making a wedge where all four sides produced a different effect, and making a few that were dedicated to particular pattern.

Step 3: Test your new wedges!
Try them out with a few consistencies of paints, thicker paints will act very different than thinner and will give you relatively varied marks.


If you make some I’d totally love to see what you come up with! Leave me a message here or get in touch via Instagram.
<3 <3